


Widgets!
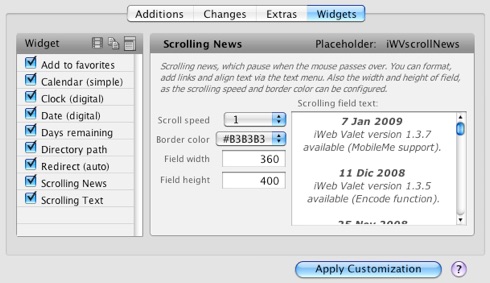
• Step 1: Choose and customize your widget

• Step 2: Put the widget placeholder on your iWeb pages


Then, in iWeb, go to the page where you want to place your widget and paste the copied placeholder (or drag and drop the placeholder from the widgets palette) in the location where you want your widget to appear. A new text box containing the placeholder will be created. At this point, save and publish your site to a folder.
• Step 3: Start customization
That's all! Now you can apply your customizations as described in the previous "How to Use" help section, and then upload your site.
Some suggestion
- Don't apply any format, picture frame, shadow, reflection, etc. to the placeholder's text box in iWeb, but use only the format options available in the widget pane in iWeb Valet. Take note that iWeb generally renders modified texts out as images in the html pages: this hampers iWeb Valet to find the placeholder!
- If the browser of your visitors doesn't support JavaScript or they have it disabled, the widgets will not work.
- Not all widgets will work with all iWeb themes or in the various platforms, browsers, etc: I apologize for this, you must test every widget by yourself.
Credits
All included Javascript code is offered as a free "public service" resource by The Javascript Source (http://javascript.internet.com) and by other free JS resource sites. Simply stated, all the scripts on those sites are free for personal or business use. The only requirement for use of archives is that you leave the credit information inside the script.


